Autumn In Tennessee - The Spot Where I Was Engaged

Autumn In Tennessee - The Spot Where I Was Engaged
by Sherri Wear 2008

Monday, September 17, 2012

Cute Baby Cap

I won't even try to pretend that I cam up with this pattern all by myself.  I'll simply post my photos and link you to the talented lady's blog who created it.  Below you will see the photos of the caps I crocheted today.


...and here is the link to the blog I mentioned....

http://daisycottagedesigns.blogspot.com/2011/07/free-owl-hat-crochet-pattern.html

Tuesday, September 4, 2012

Shredded Crock Pot Chicken With Honey-Mustard BBQ Sauce


  • 2 lbs of boneless, skinless chicken breasts
  • 1/2 cup prepared yellow mustard
  • 1/2 cup apple cider vinegar
  • 5 TBSP light brown sugar
  • 1/3 cup honey
  • 1/2 tsp each of smoked paprika, white pepper, and Worcestershire sauce
  • 1/4 tsp each of cayenne pepper, black pepper, and garlic powder
  • 6 oz of peach flavored cola ( I used Wal*mart peach sparkling water, but you could use Ne hi.)

Spray bottom of your crock pot with cooking spray.  Place partially frozen chicken breasts in the crock pot on low with about 1/3 cup of water. 

In a saucepan combine all other ingredients except the peach cola.  Heat on medium until all ingredients have combined and brown sugar and honey have thoroughly melted.  Slowly pour in the peach cola.  Stir gently.  Pour contents of saucepan over chicken in the crock pot. Cook on low for 6 to 7 hours, less if the chicken is thawed.

Remove cooked chicken from crock pot.  Remove sauce from crock pot.  Shred the chicken well with two forks.  Return the chicken to the crock pot.  Pour as much of the sauce as you like back in the crock pot and set on "keep warm" until ready to serve.  Reserve the extra sauce in case more is needed for sandwiches.  You may strain and warm the remaining sauce, thickening it as needed with cornstarch/water slurry.

Serve on buns or wrap in flour tortillas.


Monday, May 28, 2012

Joker Pinata

I am creating this post simply to show the photos of the pinata on which I have been working for almost a week.  Rest assured I will NEVER attempt to make another one, and, if this one falls apart in the next month, there will not be a replacement for the birthday party in July.  I have cursed, fussed, and cried over this POS, and it still looks pathetic.  Take my advice, spend the $25 for the pre-made Batman pinata!


Much like the e-trade baby from commercials, I underestimated the creepiness of this clown.


If you truly want to make a pinata, I suggest that you follow someone's pattern and instructions.  I made this up as I went along.  I made paper mache' with Mod Podge, water, and pages from an old phone book.  I applied it to three balloons I had taped together.  I can't even tell you how many layers are on the bottom section, but the top section has only 3 layers.  I used acrylic white paint.  I drew the face with Sharpie pens.  The hair is birthday streamers, and the hat is construction paper that I taped together while watching The Blind Side.  I have never been so disappointed in one of my DIY crafts.


PLEASE.....if anyone has had better luck with DIY pinatas, send me some photos.  I would love to see how one looks when it's done correctly.  Since this one is for a bunch of 5 and 6 year old kids, I'm just going to leave it as is and pray it bursts on the first hit.


Monday, May 21, 2012

These Flip Flops Are The Bomb...Water Bomb, That Is

First of all, let me give all the credit to the blog that inspired me to make these jazzed up flops.  The idea came from http://reddoorhome.blogspot.com/2011/07/balloon-sandals.html.  I saw the idea after someone pinned it on www.pinterest.com

All you will need is a cheap pair of flip flops and a bag of about 150-175 small multi-colored balloons, a.k.a. water bombs.  I already had the flip flops that I bought at a dollar store so I'd have something to wear to the beach while at Tybee Island in Georgia.  Today, I dropped in our local Dollar General and bought 2 bags of water bomb balloons.  Those are the only supplies I needed.


 Stretch each balloon just a little.  Next, tie the balloons (one at a time) around the the straps of the sandals.  It doesn't matter if you start at the top or the bottom. 


I varied the way I tied each balloon.  In other words, if the open end of the balloon was on the inside of the strap on the first balloon, then the open end of the balloon was on the outside of the strap on the second balloon.  This made it easier to "fluff up" the balloons when I was finished. 


Voila!  Cute flip flops for about 5 bucks.  Old Navy often keeps its flip flops on sale for 2 to 3 dollars during the summer, especially after The Fourth of July.  Don't hate on my fat feet!  I know how badly I need a pedicure!  The cute flops help the ugly feet to look better!!!

Monday, May 14, 2012

Tinted Glass Containers

I've been seeing these on Pinterest for weeks, so I finally bought some Modge Podge and tried it for myself.  They didn't turn out perfect, but I still think they are kind of cute.  I'll try some more when we collect a little more glass.


You will need a variety of glass containers.  You may use old wine bottles, baby food jars, syrup bottles, beer bottles, Coke bottles, or whatever you have on hand.

Mix 1/3 cup of Modge Podge with 1 cup of water until well combined.  Add as much gel food coloring as you would like to achieve the desired color.  Remember that the glass will be several shades lighter than your MP mixture.  Stir the food coloring in very well. 

I used a liquid measuring cup for the mixing, so it was easy to pour the mixture into the bottles.  Pour about 1/4 to 1/2 cup of the mixture into the first clean and dry glass bottle.  Swirl the liquid mixture around the inside of the bottle until ALL inside areas are coated with color.  Pour extra color mixture back into the liquid measuring cup.  Repeat this process with all of your glass containers.

Turn all containers upside down on a layer of newspaper or paper towels and allow to drain for five minutes.  Next, set containers upright to allow any liquid that did not drain to return to the bottom of each container.  Allow the containers to set for at least 1 hour or you will have ugly streaks in your finished product.  You can see several in mine.


Remove the top rack from your oven.  Place the bottles on the bottom rack. (Smaller bottles can be placed on a cookie sheet.)  Set oven to 180 degrees.  When oven has preheated with bottles inside, set your timer for 20 minutes and allow the bottles to "bake" until the timer reaches zero.

Carefully remove the VERY hot bottles and set them on a heat-safe surface to cool.  If you want the color to be darker, repeat this process once the glass has cooled COMPLETELY.


After a couple of days, I decided to try a few more colors. I bought both of these pieces at The Dollar Tree.


Wednesday, April 18, 2012

Quick Cinnamon Rolls

I found this recipe at the following site.  http://allrecipes.com/recipe/ninety-minute-cinnamon-rolls/
It is a delicious recipe, but feel free to read the reviews and tips found at the site.  Anything that I have added to this recipe will be typed in red.


Ingredients:

*     3/4 cup milk
  • 1/4 cup margarine, softened (I used 1/4 cup of salted butter.)
  • 3 1/4 cups all-purpose flour (You'll need more for dusting the counter and kneading.)
  • 1 (.25 ounce) package instant yeast
  • 1/4 cup white sugar
  • 1/2 teaspoon salt
  • 1/4 cup water
  • 1 egg
  • 1 cup brown sugar, packed
  • 1 tablespoon ground cinnamon
  • 1/2 cup margarine, softened  (I used 1/3 cup of salted butter.)
  • 1/2 cup raisins (I left these out completely because raisins remind me of ticks you find on dogs in the summertime.  YUCK!)


  • Directions:
    • Heat the milk in a small saucepan until it bubbles, then remove from heat. Mix in margarine; stir until melted. Let cool until lukewarm.  

    • In a large mixing bowl, combine 2 1/4 cup flour, yeast, sugar and salt; mix well. Add water, egg and the milk mixture; beat well. Add the remaining flour, 1/2 cup at a time, stirring well after each addition. When the dough has just pulled together, turn it out onto a lightly floured surface and knead until smooth, about 5 minutes. 
                  
    • Cover the dough with a damp cloth and let rest for 10 minutes. Meanwhile, in a small bowl, mix together brown sugar, cinnamon, softened margarine.               

    • Roll out dough into a 12x9 inch rectangle. Spread dough with margarine/sugar mixture. Sprinkle with raisins if desired. Roll up dough and pinch seam to seal. Cut into 12 equal size rolls and place cut side up in 12 lightly greased muffin cups. Cover and let rise until doubled, about 30 minutes. Preheat oven to 375 degrees F (190 degrees C).

    • Bake in the preheated oven for 20 minutes, or until browned. *Put a cookie sheet or foil under this muffin tin because the butter/sugar mixture tends to run over the sides of the pan. Remove from muffin cups to cool. Drizzle with icing. Serve warm.


    Icing:

    1 cup powdered sifted powdered sugar
    2 TBS milk - more if you want it thinner
    1/2 tsp vanilla flavoring
    1/2 tsp butter flavoring

    Drizzle over the top of warm cinnamon rolls.


    Monday, April 16, 2012

    Spaghetti Pie

    My 4 1/2-year-old son (who hates most foods) even loved this recipe!


    Ingredients:

    6 1/2 oz of whole wheat thing spaghetti or 1/2 of  a 13.25 box of pasta
    1 cup grated Parmesan cheese
    3 eggs, beaten (or egg substitute equivalent)
    1 tsp salt

    1 15 oz container of part skim ricotta cheese
    1 tsp salt
    2 tsp dried basil
    1/2 tsp onion powder
    1/2 tsp sugar

    1 lb lean ground beef or turkey sausage
    1 cup chopped onion
    1/2 cup chopped bell pepper
    1 can tomato sauce (approximately 15 oz)
    1 TBS sugar
    1 tsp dried oregano
    1 tsp dried basil
    1/2 tsp garlic powder
    1/2 tsp salt
    1/4 tsp celery seeds
    1/4 tsp dried, crushed rosemary
    dash of cayenne pepper
    1 cup shredded mozzarella cheese


    Brown ground beef or turkey in a large skillet. Add onion and bell pepper and cook until tender. Add tomato sauce and stir well. Mixture should be very thick. Add sugar, oregano, basil, garlic powder, salt, celery seeds, rosemary, and cayenne pepper. Stir well and simmer for 15 minutes.  (You can also use about 2 cups of your favorite pre-made spaghetti sauce to save time.)

    While sauce is simmering, cook spaghetti according to package directions in a large metal pot.  Drain noodles  and return to metal pot.  Stir in the Parmesan cheese and salt and allow the spaghetti to cool a little before adding eggs (so they won't cook and scramble.)  Beat eggs and pour them over the noodles.  Stir very well.  Place spaghetti noodle mixture into a greased 9 inch deep dish pie plate.  Pat noodles into plate and up the sides so that they are in the shape of a pie crust. 

    In a bowl, mix ricotta cheese, salt, basil, onion powder, and sugar.   Spread this mixture into the bottom of your spaghetti noodle "pie crust." Pour sauce over the top of the ricotta cheese mixture.  Be careful not to overfill the "crust."

    Bake, uncovered, at 350° for 20 minutes. Remove from oven. Sprinkle with one cup of mozzarella cheese. Bake 5-10 minutes longer or until cheese is melted and filling is heated through. Let stand for 5 minutes before cutting.


    Friday, April 13, 2012

    Picasso for Kiddos

    Hey did you know that Pablo Picasso's full name is Pablo Diego José Francisco de Paula Juan Nepomuceno María de los Remedios Cipriano de la Santísima Trinidad Clito Ruiz Picasso?  I didn't know either until my toddler and I started reading about the famous artist today.  I send my deepest apologies to my humanities teacher Mrs. Sally (formerly) Smith for not remembering this bit of art history and appreciation.

    Boy With Red Earring by Jackson Wear
    A construction paper collage in the style of Pablo Picasso

    I will officially begin to homeschool Jackson this August, but I try to do a little here and there so he'll be ready for the kindergarten curriculum.  Well, phonics and numbers get boring even with the help of "Blue's Clues" and "Team Oomi Zoomi."  I just could NOT handle being bored on a Friday.  I remember how my 8th graders hated doing work on Fridays, especially in the springtime.  I had to come up with something better than classic academics today.  While browsing through www.pinterest.com last night, I came across several art crafts and lessons for kindergarten and other school-age children.  I decided since Jackson is a child prodigy ( I mean, he is MY son), he could handle some of these lessons at the age of 4.  I'm happy to say that I was right about this decision.

    There are countless sites with information about Picasso on the Internet, but I settled on one that focused on basic information about the man and gave a lot of examples of his works.  That site is http://www.mykidsart.com.au/Pablo_Picasso_Famous_Artists_My_Kids_Art.html.  We read the information.  We found Picasso's places of birth and death on a world map.  Then, we began to look at his art, especially his later, more abstract works.  Jackson thought it was "cool" that Picasso didn't try to make everything look "perfect."  I liked his reaction to the work.  Most adults with no appreciation for art make statements like, "I could paint better than that" or "It looks like a child did it." 

    I saw on another site (that I can't remember) how one lady had her child make a work of art in the style of Picasso out of construction paper cut and placed into a sort of collage.  I knew Jackson needed to work on his cutting skills with "big boy" scissors, so I thought I would try something similar.  Instead of printing a bunch of pictures, we kept the iPad handy so we could refer to it to compare some of Picasso's more famous works.  I didn't want Jackson to copy one particular painting.  I wanted him to focus on the style and the bright colors.  We decided to only make a face.  He picked out all of his favorite bright colors.  I let him draw the shapes and glue them into place.  I didn't have any children's safety scissors, so when we got to the smaller parts of this "masterpiece," I let Jackson draw them while I cut them.  Mostly, I cut the dots and pupils.  He had such a great time, and so did I.  Jackson named it Boy With Red Earring.  I have to say that I thought it was a female until he told me otherwise. 

    Jackson with his masterpiece

    I am hoping to get my husband to sit down long enough tonight so that all of us can use acrylic paint to try to copy one of Picasso's paintings.  My hope is that this activity will show Jackson how everyone sees things differently and how much fun family time can be without a computer or television.  If it works out, I will post photos of our paintings. 

    I hope this inspires someone out there to get kids interested in art at a young age.  If things keep on their current path for public schools, it may be the only art appreciation American children ever receive. 

    4/14/12
    Well, I tried the activity that I mentioned with my family attempting to paint one of Picasso's works.  I don't know if it showed that everyone sees things differently, but it definitely showed us that Picasso's work are not easily copied. The painting that we tried to copy was Picasso's Girl With Red Beret. I feel that he may be turning over in his grave after our attempts!  We did have fun, and I encourage everyone to try replacing family game night with family paint night.

    Family Paint Night
      
    Pablo Picasso's Girl With Red Beret

    Jackson's Girl With Red Beret Copy

    
    Daddy's (David's) Girl With Red Beret Copy

    Mommy's (Sherri's [My]) Girl With Red Beret Copy


    Wednesday, April 11, 2012

    Park Plaza Squares

    We called these park plaza squares in my part of Georgia, but evidently the Queen of Savannah, Georgia, a.k.a. Paula Deen, calls it a Gooey Butter Cake.  My husband says they are often called chess bars here in east Tennessee.  Whatever you decide to call them, just know that they are SUPERB!  Paula's recipe can be found at http://www.pauladeen.com/recipes/view2/gooey_butter_cake.  I'll give you the recipe I used because I refuse to go to the store more than once each week, and I am known for using whatever I can find in the pantry and refrigerator (usually sugar or fat free to benefit hubby.)


    Ingredients for cake:

    1  16 oz  Pillsbury Moist Supreme Sugar Free Classic Yellow cake mix
    1 large egg
    1 stick melted butter
    2 tsp lemon flavoring

    Ingredients for filling:

    1  8-ounce package fat-free cream cheese, softened
    2  eggs
    1  teaspoon vanilla
    1  stick melted butter
    1  16-ounce box powdered sugar


    Directions:

    Preheat oven to 350.  Lightly grease or spray a 9 x 13 baking pan.

    Combine the cake mix, egg, and butter, and lemon flavoring and mix well with an electric mixer. Pat the mixture into the bottom of  the baking pan.

    Beat the cream cheese with an electric mixer until smooth. Add the eggs, vanilla, and butter and beat together.  Add the powdered sugar and mix with a spoon or spatula to incorporate as much sugar as possible before using the electric mixer.  (I hate having powdered sugar fly all over the kitchen.)  Mix with your electric mixer until the mixture is very smooth. 

    Pour/spread the cream cheese mixture over the top of the cake batter.  Bake for 45 minutes.  Let cool 20 minutes before slicing.


    Tuesday, April 10, 2012

    Hummingbird Cake

    My Aunt Mary Will Peterman use to make this cake when I was a little girl.  I had forgotten about it until I came across Paula Deen's recipe a couple of years ago.  It so reminds me of my sweet great-aunt.  This is Martha Stewart's recipe, but she gives credit for the recipe to Paula Deen on her site http://www.marthastewart.com/350178/hummingbird-cake.  The photo below is the cake I made for Christmas 2010.


    Ingredients


    FOR THE CAKE
    Nonstick vegetable spray
    All-purpose flour, for pans
    3 cups self-rising flour
    2 cups granulated sugar
    3/4 cup vegetable oil
    1/2 cup finely chopped pecans
    2 very ripe large bananas, mashed
    1 (8-ounce) crushed pineapple, with juice
    1 teaspoon pure vanilla extract
    1 teaspoon ground cinnamon
    4 large eggs, beaten

    FOR THE FROSTING
    1 pound (1 box) confectioners' sugar
    1 (8-ounces) cream cheese, room temperature
    6 tablespoons (3/4 stick) unsalted butter, softened
    1 teaspoon pure vanilla extract
    1 tablespoon milk, or more if needed
    1/2 cup finely chopped pecans


    Directions
    Preheat oven to 325 degrees. Spray and flour three 8-by-2-inch round cake pans, tapping out excess flour; set aside.

    Prepare the cake; in a large bowl, stir to combine self-rising flour, sugar, oil, pecans, bananas, pineapple, vanilla, cinnamon, and eggs.
    Divide batter evenly between prepared pans, smoothing with an offset spatula. Bake, rotating pans halfway through, until the tops spring back when gently pressed with your fingertips, 26 to 28 minutes.
    Transfer pans to a wire rack to cool 10 minutes. Invert cakes onto wire rack. Re-invert cakes and let them cool completely, top sides up.
    Prepare the frosting; in the bowl of an electric mixer fitted with the paddle attachment, combine sugar, cream cheese, butter, vanilla, and 1 tablespoon milk on medium speed until frosting is smooth. If needed, add more milk, 1 teaspoon at a time, to achieve the proper spreading consistency.
    Using a serrated knife, trim tops of cakes to make level. Place four strips of parchment paper around perimeter of a serving plate or lazy Susan. Place the first layer on the cake plate. Spread the top of the first layer with 1/4 of the frosting. Place the second layer on top and repeat process with another 1/4 of the frosting. Place the remaining layer on top of the second layer bottom side up. Spread entire cake with remaining frosting. Sprinkle the top with pecans. Remove parchment paper strips; refrigerate until ready to serve.

    Wednesday, April 4, 2012

    Easy Strawberry Daiquiri Icebox Dessert


    Ingredients:

    2 packages (of the 3 found in a box) of reduced fat graham crackers
    1  14 oz. can fat free sweetened and condensed milk
    1 single serving container fat free vanilla yogurt
    1 1/4  cup frozen strawberry daiquiri mix
    Juice of one lemon
    1 LARGE container of lite Cool Whip


    Line the bottom of an 8 x 8 baking dish with graham crackers.  In a large bowl, beat together sweetened and condensed milk, daiquiri mix, yogurt, and lemon juice.  Fold in 2/3 of a LARGE container of lite Cool Whip. Spoon 1/2 of mixture onto the graham crackers.  Place another layer of graham crackers on top of Cool Whip mixture.  Spoon the remainder of the Cool Whip mixture onto the 2nd layer of graham crackers.  Top this layer of the Cool Whip mixture with a final layer of graham crackers.  Cover with the remaining 1/3 container of the lite Cool Whip.


    Freeze dessert at least 4 hours before serving.  Set out of the freezer for 10 minutes before slicing.  Enjoy!!


    Tuesday, April 3, 2012

    Stuffed Pizza Balls


    Ingredients:

    • 1 can of refrigerated pizza dough
    • 1 heaping TBS of flour
    • dried oregano
    • dried basil
    • garlic powder
    • onion powder
    • 4 to 6 individually wrapped mozzarella string cheese (cut into 24 pieces)
    • 24 slices of turkey pepperoni
    • 2 TBS olive oil
    • 2 TBS grated Parmesan cheese
    • 1 jar of pizza sauce (or you can make your own)

    Preheat oven to 400 degrees.  Sprinkle your flour onto a flat surface.  I used a cookie sheet.  Open your dough and place it in the flour.  Roll or pat the dough to form a rectangle that can be cut into 24 equal squares (You can see below that my squares were not equal, and some of the pizza balls were very uneven).  All of the dough should be the same thickness.  Sprinkle as much as you like of the oregano and garlic powder over the dough. Use a pizza cutter to cut the dough into 24 pieces...four cuts vertically and six cuts horizontally.  Place one slice of pepperoni on each square of dough. Top each slice of pepperoni with one piece of the cheese.


    Begin to fold in the sides of the squares of dough. 


    Pinch all of the sides together after they are folded to seal the dough. 


    Place each dough ball pinched/sealed side down into a greased 8 x 8 baking dish. 


    Brush the tops of the dough balls with olive oil, then sprinkle the top of the dough with as much oregano, basil, garlic powder, and onion powder as you like.  Sprinkle the grated Parmesan cheese on top. 


    Place into your preheated oven.  Bake for 25 to 30 minutes or until pizza balls are golden brown. 


    Serve with your favorite pizza sauce.  Enjoy.


    Friday, March 30, 2012

    Cheesy Ham and Spinach "Garbage Bread"


    I had never heard the term "garbage bread" in my life until I was reading a post from the blog http://emmalinaviolet.wordpress.com/2011/11/16/buffalo-chicken-garbage-bread/. This young woman explains that garbage bread is "basically a calzone except you wrap the pizza dough so its in layers." I liked the idea of wrapping or rolling the bread, so I set out to come up with a recipe using ingredients I could find in my refrigerator. Please note that it is not necessary to use the fat free or low fat versions of ingredients that I use.  The regular versions will work just fine.  My husband said he really liked this one, so I figure it is a keeper!


     Ingredients for filling:

    1 8 oz package of fat-free cream cheese (softened)
    1/4 cup fat free sour cream
    1/4 tsp dried and crushed rosemary
    1/2 tsp onion powder
    1/2 tsp garlic powder
    1/2 tsp salt (not pictured)
    1/2 tsp black pepper (not pictured)
    1/2 tsp ground nutmeg (not pictured)
    1 tsp hot sauce (more if you like)
    1 tsp vinegar of your choice (I prefer rice vinegar)

    Mix all of the ingredients together in a bowl.  I used my hands (as usual) because I like to leave a few chunks of cream cheese here and there throughout the bread. 


    Ingredients for garbage bread:

    1 roll of refrigerated pizza crust (don't use the thin crust variety)
    1  9 oz package of frozen spinach, thawed and well-drained
    1 to 1 1/2 cups diced ham (I got this at Hell*mart ... uh ... I mean Wal*mart)
    3/4 cup of grated Parmesan cheese
    3/4 cup of grated mozzarella cheese
    1 TBS finely chopped cilantro
    1 TBS of butter or olive oil for coating the cooked bread when it comes out of the oven

    Preheat oven to 375 degrees.  Open pizza dough and shape it into a rectangle on a greased cookie sheet.  Work with it slowly so it doesn't tear.  Allow dough to rest on sheet while you prepare the spinach and the filling.  Microwave the spinach for 5 to 6 minutes.  Drain in a colander.  Squeeze it VERY well between layers of paper towels or a towel.


    Spread the filling onto the pizza dough leaving about an inch to 1 1/2 inches of dough around the perimeter with no filling on it.


    Place the spinach, Parmesan cheese, ham, mozzarella cheese, and cilantro on top of the filling.


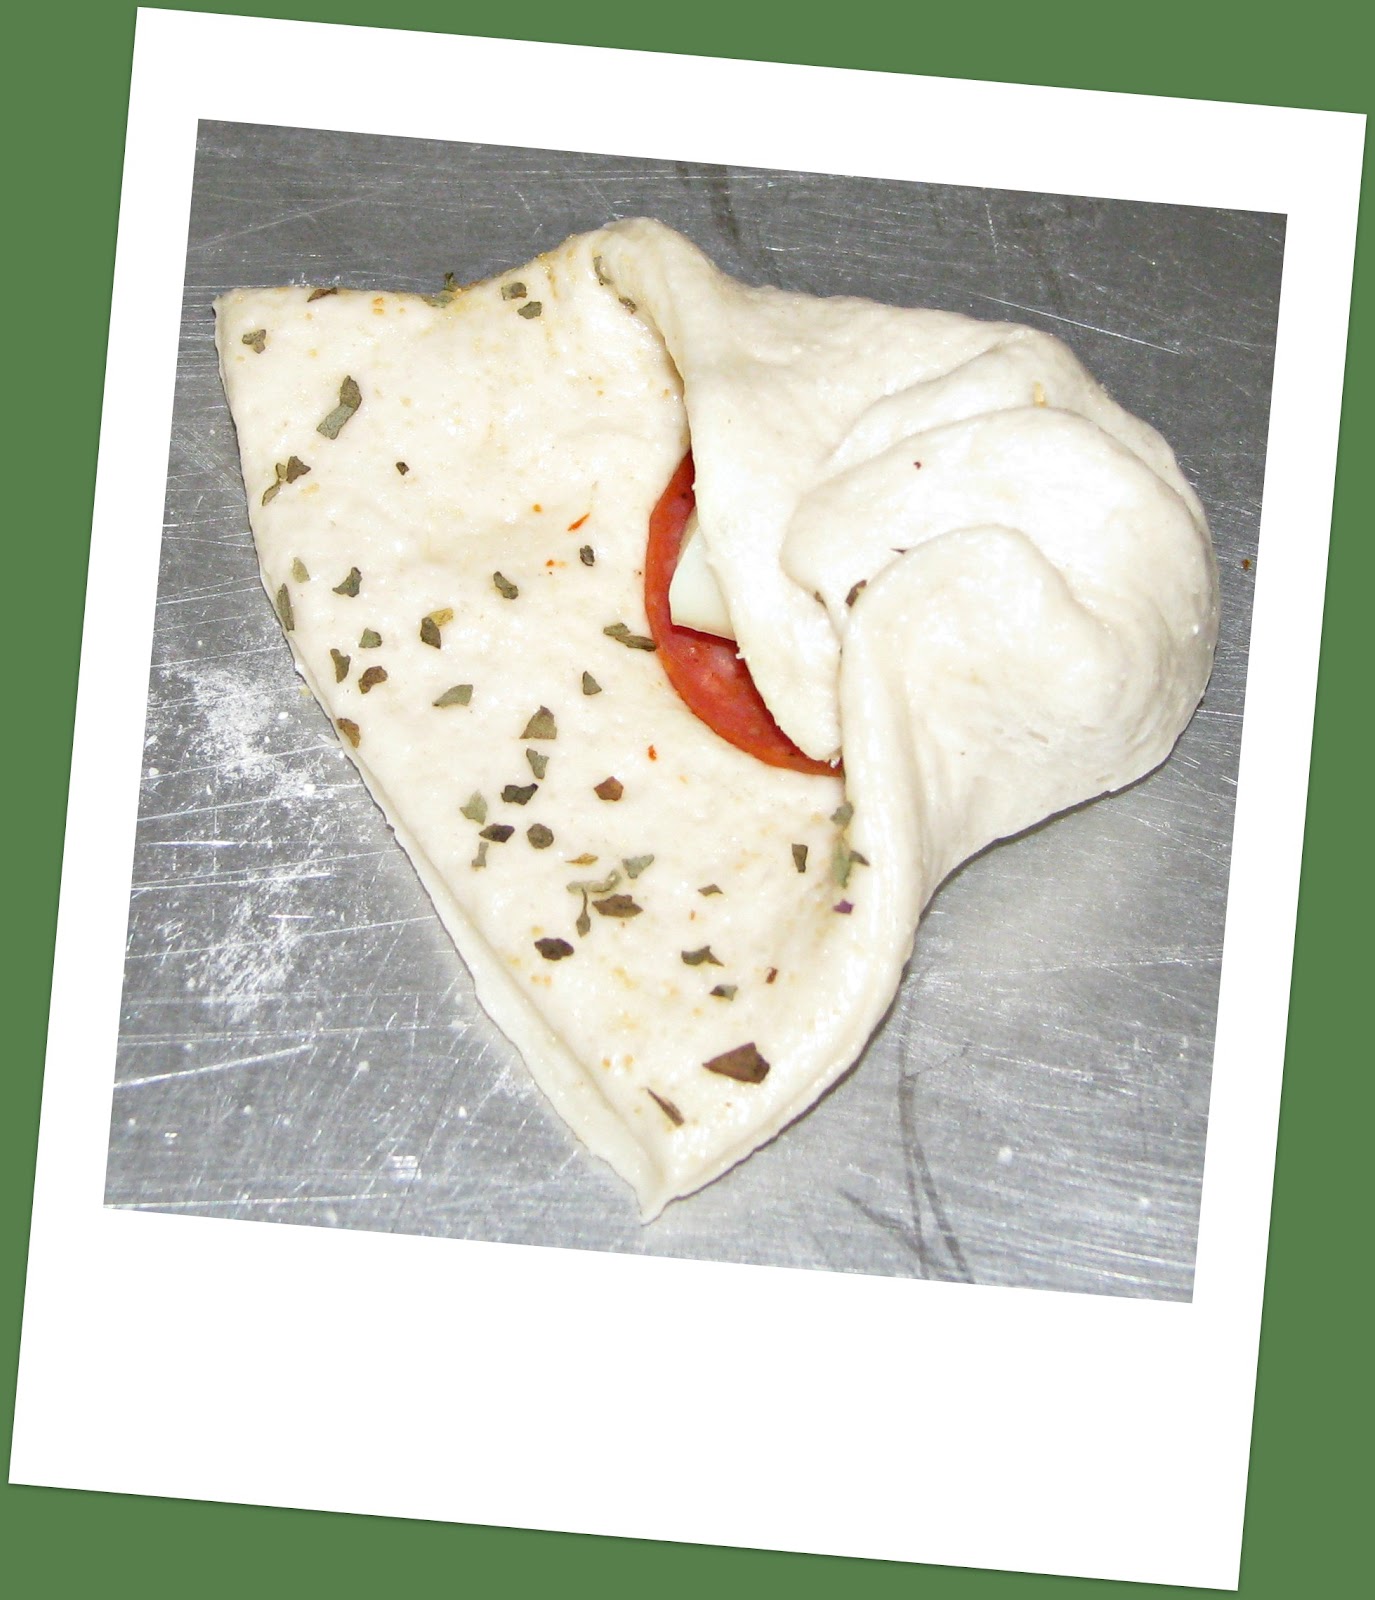
    Fold in the edges of the dough that do not contain the filling as shown in the above photo.


    Roll the dough "jelly roll style" as shown in the above photo.  Press the seam closed and make sure that the seam is on the bottom when baking.


    Place the prepared and filled dough in the center of the cookie sheet, and place the cookie sheet in the center of your preheated oven.  Cook at 375 degrees for for 25 to 30 minutes. 


    Remove from oven and brush the top with 1 TBS of butter or olive oil.  Let the bread rest for 5 minutes before slicing.  Enjoy!!